Well, I did some further experimenting with the Helena and Demetrius pigment from yesterday’s post. I poured the pigment into a little plastic bag and crushed it with a spoon. I did get a finer pigment with less lumps, but they were still there. I could have ground it to bits with my mortar and pestle, but that wastes a lot of pigments (it gets caught in the grooves of the dish).
It was still visibly bumpy on the nail. I added some MAC Reflects Teal glitter to the mix (a pea-sized amount) and it distracts from the lumpies!

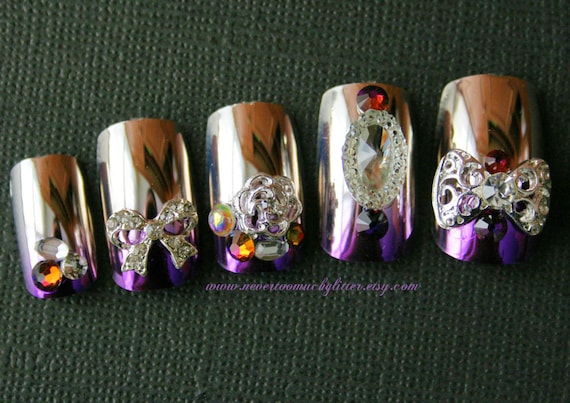
I still knew the lumps were there, and it was annoying. So I decided to do a gradation, though it didn’t show up well in the photo. I made a transparent purple (a few drops of purple in 20 drops clear polish) and painted it updwards from the middle to the tip. Then I added a darker purple on the tips. Next, I painted over the whole thing with a coat of clear polish (not Seche, that would have caused shrinking) while the polishes were still wet. This blended them together. Finally, I added three Swarovski crystals from that giant haul I bought a while back.

I love blues and purples! Plus glitter and rhinestones?! What more could anyone want?


It looks more like a french but if I look, I can definatly see the the gradient.
Yeah, it does look like a French tip in the photos but is more gradated in real life. I wish I could actually take photos during the day, but I leave my house before 7AM and get back after dark.
it might work if you put the pigment in a plastic bag then use the mortar and pestle? just a suggestion because that’s how i see my mom actually use the mortar and pestle =P
That’s a great idea- because I don’t want to waste all the pigment in the grooves of the bowl. I’ll give it a whirl next time I have a lumpy pigment.
That’s very pretty. I can see the graduation very clearly. Beautiful and of course I love those crystals.
Thanks Lucy! Glad you liked it!